 My Blog
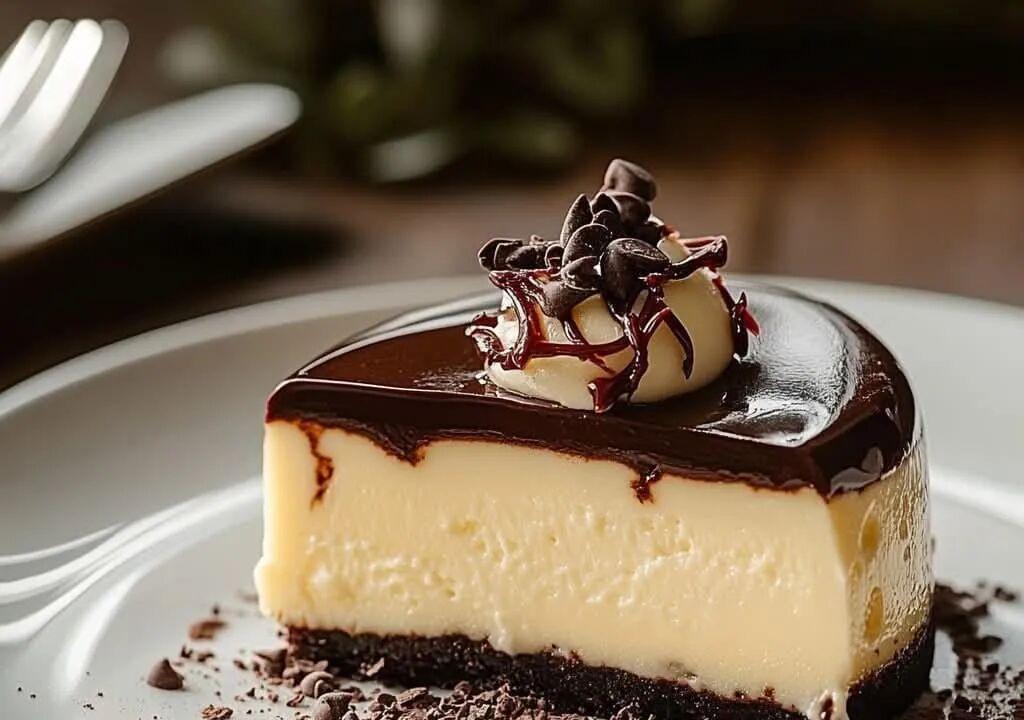
Smooth cream and chocolate glaze 🍫 🍮
Want something special? This cake is the perfect blend of a crunchy cookie base, vanilla-flavored smooth buttercream, and a shiny dark chocolate icing.
With no oven required, this cake is ideal for surprising your guests or treating yourself! 😍 👌
Ingredients (for 8-10 people):
Bottom material
200 g digestive cookies or maria biscuits
100 g melted butter
cream
500 ml of milk
200 ml of whipped cream (not less than 35 fat content)
3 egg yolks
100 g sugar
1 tsp vanilla extract
3 tablespoons cornstarch (cornstarch)
Making a chocolate glaze
150 g dark or semi-bitter chocolate
100 ml whipped cream
1 tablespoon butter
🧁 Manufacturing instructions:
Step 1: Prepare the base material
Use a rolling pin or food processor to grind the cookies into a powder.
Mix with melted butter until a moist texture forms.
Place the mixture in a springform pan (20-23 cm) lined with baking paper at the bottom.
Press and refrigerate for 30 minutes (optional: bake at 180 °C for 10 minutes to make the bottom firmer).
Step 2: Prepare the cream
Heat the milk and cream in a pan to a slight boil.
Additionally, beat the egg yolks with sugar until creamy.
Dissolve the cornmeal in a little cold milk and add to the egg yolk.
Slowly pour the mixture into the warm milk, stirring constantly, and cook over medium-medium heat until thick (5-7 minutes).
Remove from heat, add vanilla extract and let cool, stirring occasionally.
Step 3: Prepare the chocolate glaze
Heat the cream to near boiling point.
Add the chopped chocolate and let rest for 2 minutes. Mix until smooth.
Add the butter and beat until the frosting is shiny.
Step 4: Assemble the cake
Pour the cold cream over the cooled cookie base.
Cover with chocolate glaze and smooth the surface.
Refrigerate for at least 4 hours, preferably overnight.
Step 5: Serve and enjoy
Demolding carefully.
It can be garnished with chocolate shavings, fresh fruit (such as raspberries or strawberries), coconut or sliced almonds.
🕒 Time:
Preparation time: 30 minutes
Cooking time: 20-25 minutes
Cooldown: Minimum 4 hours
Total time: Approximately 5 hours
Yield: 8-10 servings
Estimated calories per serving: 340
✅ Other tips:
To make the cake bottom more firm and crisp, you can bake the cake bottom first, and then bake the filling.
Like it a little sweeter? Swap dark chocolate for milk chocolate.
For something lighter, use plant-based milk and unsweetened chocolate.

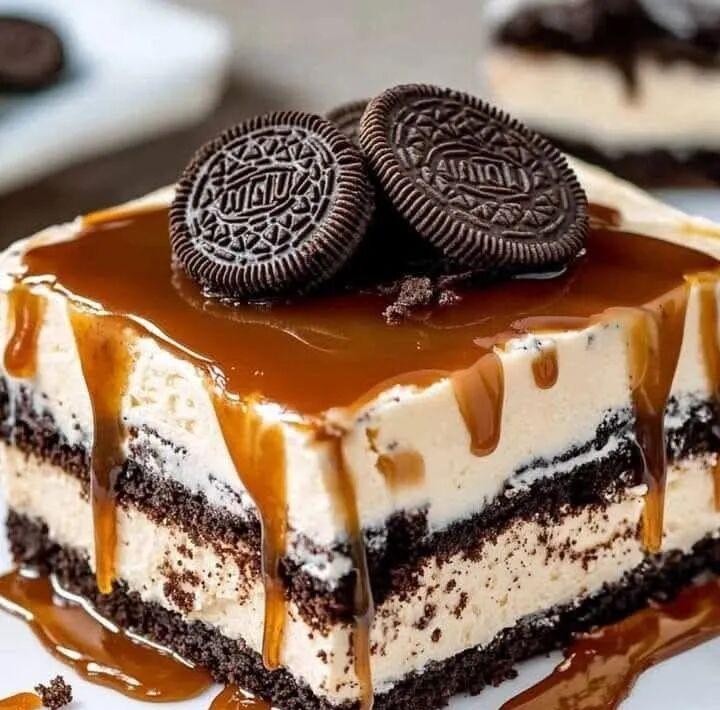
Easy Oreo Ice Cream Cake Without Baking with Salty Caramel
Ingredients
8 oz softened cream cheese pack.
1 ⁄ 2 cup caramel ice cream topping.
1 ⁄ 2 tsp coarse sea salt (adjust to taste)
32 Oreo cookies (about 4 packs)
6 oz espresso, refrigerated (sweetened if desired)
4 cups cool cream, evenly divided
For decoration
Caramel syrup
Chocolate syrup
Extra sea salt
Preparation method
Prepare the baking dish
Line an 8 “x 8” baking sheet with non-stick parchment paper for easy removal.
Mix together the caramel and salt:
In a mixing bowl, whisk together the caramel ingredients and the coarse sea salt. Taste it and adjust the salt if necessary.
To make the cream cheese mixture:
In a separate bowl, beat the cream cheese and caramel mixture together until fine and smooth.
Gently pour into 3 cups of Coolway sticks until well combined.
Dip Oreos:
Dip 16 Oreo cookies into the cool jelly and let them soak briefly to absorb some moisture. Line the bottom of the prepared baking dish in a single layer.
Line with cheesecake mixture:
Spread half of the caramel cheesecake mixture over the coffee-dipped Oreos.
Spread another layer of 16 coffee-dipped Oreos and remaining cheesecake mixture.
Finally drizzle with cool crisp wafer:
Sprinkle the top of the cake with 1 cup of cool buttercream.
Chill the cake in the refrigerator until fully set, preferably at least 4 hours or overnight.
decorate
Before serving, spread another layer of cool whipped cream on the surface of the cake and drizzle with caramel syrup and chocolate syrup. Also sprinkle with extra sea salt if preferred.
Slice and serve:
Cut the cake into 9 squares and cut cleanly with a knife dipped in boiling water.
Notes
The amount of sea salt can be adjusted according to personal preference.
Perfect for making ahead, this pie is great to eat refrigerated on warm days.

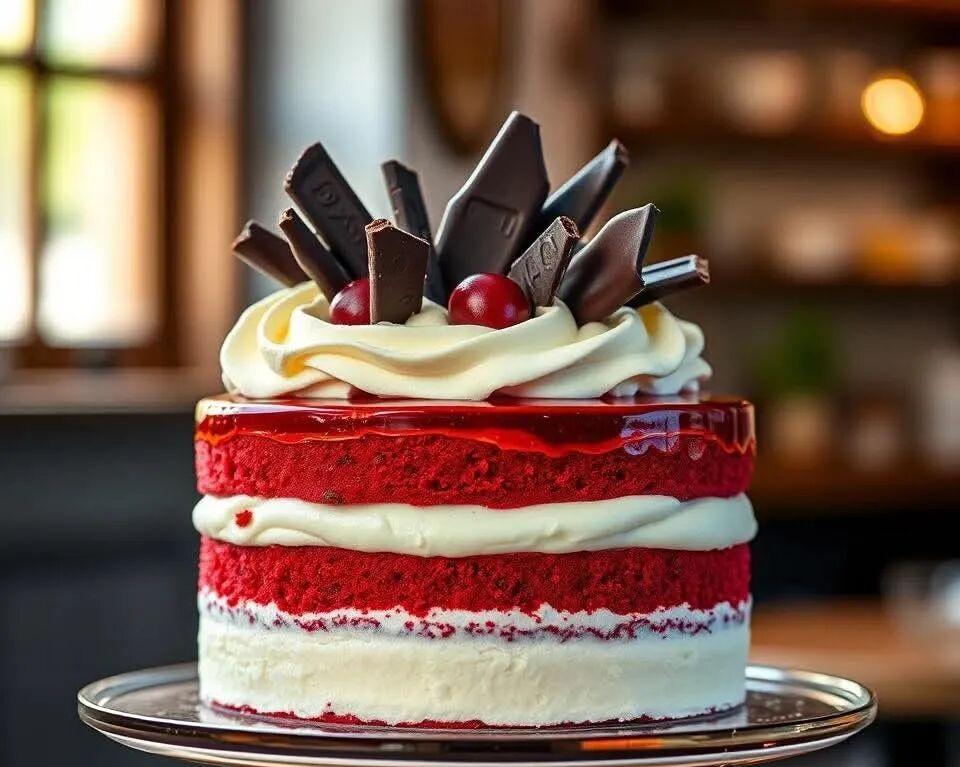
Red velvet cake with cheesecake, cherries and chocolate
Ingredients
Red velvet cake
-2 cups flour
-1 ½ cup sugar
-1 cup buttermilk (or milk with 1 tablespoon vinegar)
-½ cup vegetable oil
-2 eggs
-2 tablespoons cocoa powder
-1 tsp white vinegar
-1 tsp baking soda
-Appropriate amount of red food coloring
-1 teaspoon vanilla extract
Making a cheesecake filling
-400 g of cream cheese
-½ cup rock sugar
-1 teaspoon vanilla extract
-200 ml whipped cream
Ingredients
-Cherry or red berry jam
-Chopped dark chocolate
-Fresh cherries (optional)
-Chantilly cream or whipped cream for garnish
[Warm Tips]
When making Western-style pastries, commonly used cups and tablespoon/teaspoon are standard units of capacity, which are mainly used to measure the volume of ingredients, rather than directly expressing weight. To convert these capacities into grams (g), it needs to be calculated based on the density of the specific ingredient, because the weight of different ingredients varies greatly.
Here are the approximate weights of some common ingredients for reference:
Cup Weight Conversion
1 cup = about 240 milliliters (mL), but the grams depend on the ingredients:
all-purpose flour: 1 cup ≈ 120-130 g (depending on the degree of compaction)
granulated sugar: 1 cup ≈ 200 g
brown sugar: 1 cup ≈ 220 g (lightly pressed)
butter: 1 cup ≈ 227 g
milk: 1 cup ≈ 240 g
water: 1 cup ≈ 240 g
Spoon weight conversion
1 tablespoon (tablespoon, tbsp) = 15 ml
Flour: 1 tablespoon ≈ 8-10 g
White sugar: 1 tablespoon ≈ 12.5 g
Cream: 1 tablespoon ≈ 14 g
Water: 1 tablespoon ≈ 15 g
1 teaspoon (teaspoon, tsp) = 5 ml
Flour: 1 teaspoon ≈ 3-4 g
White sugar: 1 teaspoon ≈ 4 g
Salt: 1 teaspoon ≈ 6 g
vanilla extract: 1 teaspoon ≈ 5 g
Notes
Status of ingredients: For example, whether the flour is sifted and whether the sugar is compacted will affect the weight.
Precise measurement: If the recipe calls for precision, it is recommended to use an electronic scale to weigh directly, rather than relying entirely on cups or spoons.
Regional differences: This refers to the standard cup (240 mL) commonly used in the United States, other regions (such as Australia, 1 cup = 250 mL) may vary slightly.
END