Castella Sponge Cake 😋
Ingredients
4 medium eggs, room temperature
110 g sugar
2-3 tablespoons honey
100 g high-gluten flour
Preparation
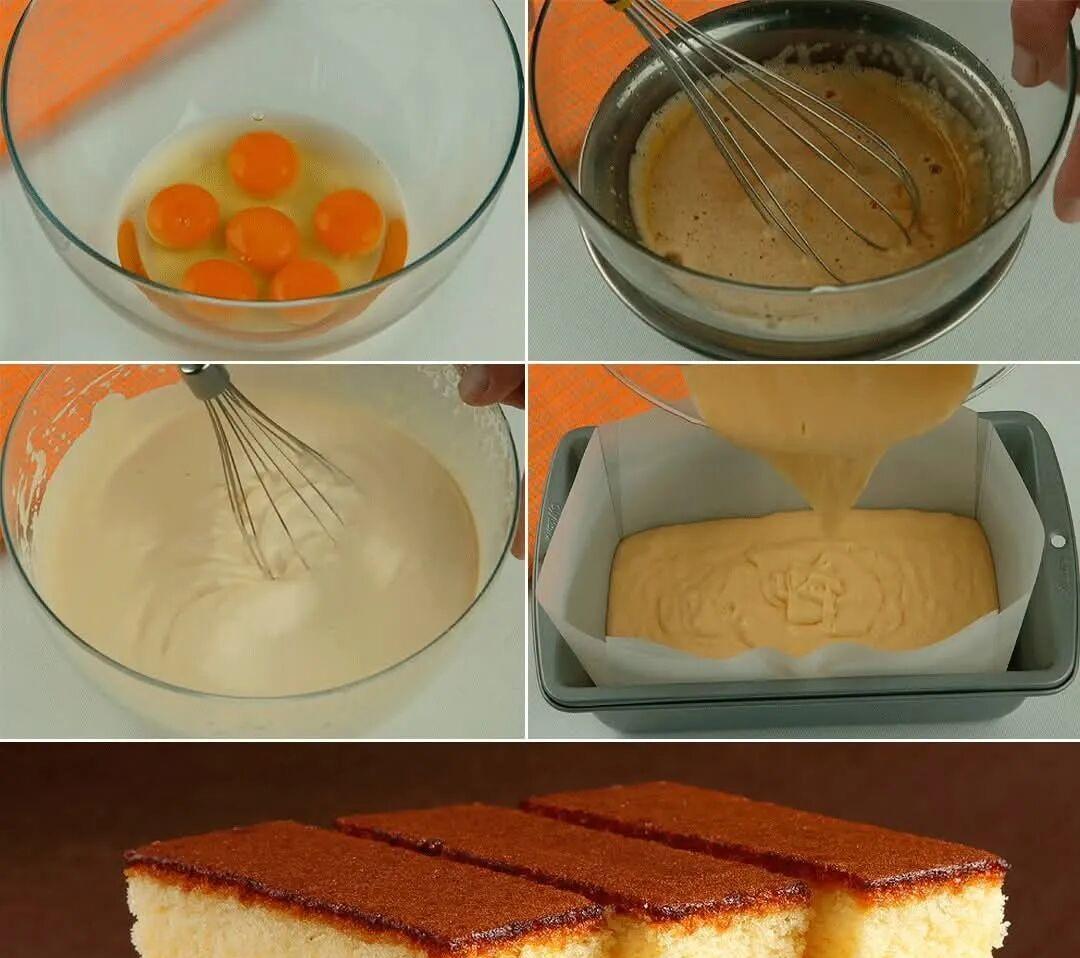
1. Beat the eggs in a metal bowl, add the sugar and beat with an electric mixer in boiling water on high speed for 6 minutes. Beaten eggs will increase in volume by about 4 times.
2. Add honey to the egg mixture and stir at medium speed for about 30 seconds.
3. Sift 1/3 of the flour into the mixture, then gently beat it on medium speed, then add 1/3 of the flour and beat it. Add the last 1/3 of the flour and beat until just mixed, about 1 minute. Do not over-mix it or it will cause the cake to fall or flatten.
4. Line a cake tin with parchment paper and pour the batter into the tin. Draw a zigzag line with a meat stick to remove large bubbles from the batter. This will give the cake an even texture.
5. Bake in a preheated 180 °C oven for 10-15 minutes until dark brown on the surface. Then quickly cover with kitchen paper, reduce the temperature to 170 °C and continue baking. It takes about 55 minutes in total. Test with kebabs, and if the kebabs are not broken, the cake is baked.
6. Once baked, remove the cake from the oven and immediately cover the surface with plastic wrap.
7. Turn the cake onto a flat plate, put it in a plastic bag while it is hot, and leave it for 12 hours to make the cake taste moist.
8. Before serving, cut the sides of the cake. Serve with tea or coffee and drizzle with a spoonful of whipped cream, it’s even more delicious.

🎂 Sponge cake in a mixer 🍰

📝 Raw Material:
1 cup sugar
1/2 cup vegetable oil
3 eggs
1 cup milk
2 cups wheat flour
1 tablespoon baking powder
1 tsp vanilla extract
A pinch of salt
🔔 Manufacturing instructions:
Step 1: Prepare the mixture
-Add sugar, vegetable oil, eggs and milk in a blender. Mix on high speed until the mixture is well incorporated and smooth.
Step 2: Add the dry ingredients
-Add wheat flour, baking powder, vanilla extract and a pinch of salt to the blender mixture. Mix again until smooth and lump-free.
Step 3: Bake
-Preheat oven to 180 °C (350 ° F). Lightly grease or butter the cake tin and pour the mixture into the tin.
-Bake for 30-35 minutes until smell-free when inserted through the middle with a toothpick.
Step 4: Cool and serve
-Once baked, remove the cake from the oven and let it cool in the tin for a few minutes. Then unmold and cool completely on a grid rack before serving.
Preparation time: 10 minutes | Cooking time: 35 minutes | Total time: 45 minutes | Portions: 8
Enjoy your mixed sponge cake! It’s a fluffy and flavorful dessert that can be done in the blink of an eye. 🎂 🍰
Cold coffee mousse cake

Base material ingredients
-200 g Maria biscuits or digestive biscuits
-100 g melted butter
Mousse ingredients
-250 ml cold heavy cream
-200 g of cream cheese
-100 g of rock sugar
-2 tablespoons instant coffee, dissolved in 3 tablespoons hot water
-6 g of tasteless gelatin, dissolved in 3 tablespoons of hot water
Decorative ingredients
-cocoa powder
-Coffee beans or grated chocolate
Prepare the substrate:
Grind the cookies into a powder and mix with the melted butter. Spread the bottom of the spring can with this mixture and compact it. While preparing the mousse, place it in the freezer.
Prepare the mousse
Whip the whipped cream until soft and thick, set aside. In a separate bowl, mix the cream cheese with the rock sugar until smooth. Add the dissolved coffee and stir well. Add the dissolved gelatin and mix quickly to combine. Further add the whipped cream until well mixed.
Assembly:
Pour the mousse onto the cookie base and smooth the surface. Place in the refrigerator for at least 4 hours until set.
Decoration:
Sprinkle with cocoa powder before serving and garnish with coffee beans or grated chocolate if desired.
EN